
Whether you’re just starting a rental business or have been renting out mountain bikes, party boats, camping gear, or vacation homes for years, you’ve likely thought about setting up an online rental store.
Because there are many reasons why you should rent your stuff online beyond meeting the expectations of customers today, such as:
- Earning more revenue: your hours of operation never delay or prevent a rental since customers can rent on the fly, 24/7
- Saving a bunch of time: with an online rental form, you don’t have to spend hours taking calls or sending emails back and forth
- Speeding up rentals: customers can pick a time slot, sign a rental agreement, and get instant confirmation, all in a matter of clicks
- Reducing no-shows: you can keep customers on the hook by taking a deposit and sending an automated email reminder
But you might not know how to create a rental website. Where do you begin? How much is it going to cost? What will you even need?
So let’s go over the steps for getting up and running with online rentals, starting with the two things that’ll make everything 100x easier:
1. Rental website builder
Unless coding is your second language or you’re the Banksy of graphic design, don’t create a rental website from scratch. Instead, use a website builder to DIY at an affordable price. No HTML experience is required.
With pre-made templates and a visual editing tool (most often a drag-and-drop editor), all you have to do is enter text, add images or videos and customize the look to match your brand. Sounds too good to be true? Well, it is, and it isn’t.
Although website builders are easy to use and require little maintenance, they do have limits. So if you plan to add more pages as your business grows, it’s best to go with a content management system (CMS) instead, like WordPress, because it’s far more scalable. Plus, it has more than 58,000 plugins that can help you do way more with your website.
Nonetheless, there are many excellent website builders to choose from, including Wix, Squarespace, and Weebly, which have enough options and features to get your website up and running. Most of them have free plans or entry plans with an average cost of $12 per month to get started.

Find the right website builder for you with Checkfront!
Online bookings. Flexible pricing. Outstanding support.
2. Online booking software for rentals
It’s one thing to have a website that showcases your most popular rental items as if they’ve never been used before and another to show their live availability. Without online booking software, you’ll be stuck in the same boat of answering endless calls and emails. Your stuff will just be online.
There are three parts of online rental booking software that’ll turn your website from a static catalog into an online shop:
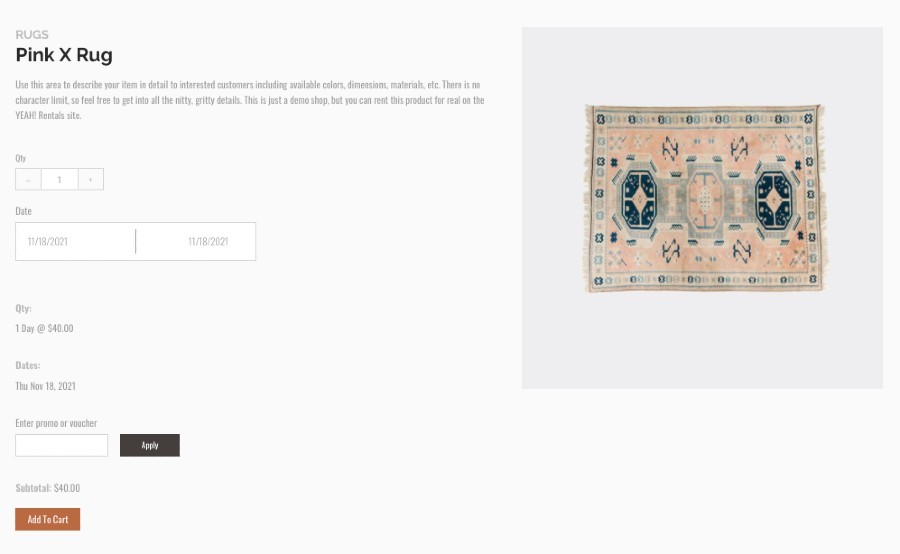
- Front-end: what your customers see on your website, including an item gallery, calendar availability, rental form, and payment steps
- Back-end: where you manage your inventory, view your rental schedule, create packages and discounts, and so much more
- Integrations: how you customize your set-up with third-party platforms to meet your unique needs, such as Quickbooks Online
However, like website builders, you’ll have to be selective about the online booking software you choose to go with because some might not have the functionality to support rental companies.
For instance, some can only handle one time slot type, usually hourly for appointments. If you rent out items per day, per hour, or at custom intervals, you’ll need options to take bookings for various lengths of time.
Luckily, Checkfront was built with rentals in mind. With the flexibility to choose between different time slots, you can customize availability on a per-item basis, even become a one-stop-shop and offer other services, such as accommodation, lessons, or tours.
Want to set up a rental website and online bookings in one place? Get started with Checkfront for free today!
How to create a rental website
Once you have booking software and a rental website builder, you can start setting up your online rental shop. Let’s walk through the steps:
1. Make your website accessible
The only way to go live with your website is to make it available on the internet. While this will be your biggest cost, it’s necessary to keep your website up and running. Here’s what you need to do:
Find a web hosting provider
A web host provides a safe place to store your website files, which an internet browser can access. There are a few options:
- Shared hosting: where a single server hosts numerous websites. This is the cheapest option to get started, but you have more risk of site disruption since the server’s resources are spread thin
- Virtual private serves (VPS): similar to shared hosting, except your files are stored in a dedicated space with dedicated resources
- Dedicated hosting: a higher cost and regular maintenance, but you get a dedicated server with more functionality and less risk
- Cloud hosting: the newest option, cloud hosting uses multiple servers to ensure maximum performance and uptime
Whatever option you choose to go with, make sure that your web host offers an SSL certificate to protect your website, especially since you will be collecting sensitive customer data with online rentals, such as email addresses and credit card details.
Web hosting can cost you anywhere from $3 per month to $730 per month, depending on the type of hosting you need. There are free web hosts available too, but they often come with slower site speeds, outages, and lack of customer support.
(P.S. A lot of web hosts also provide domain registration and come with a website builder. A win-win-win solution for you!)
Register a domain name
A domain name is the easy-to-identify address people type into the URL bar to visit your website. You don’t necessarily need to buy one to create a rental website if you go with a free web host since they allow you to piggyback off theirs with a subdomain, which looks something like this:
yourbrandname.webhostname.com
However, we highly recommend connecting a custom domain because:
- Branding is important; customers should recognize your brand name, not get distracted by another that means nothing to them
- Shorter URLs are easy to remember. Can you imagine telling a customer, “visit us at www.bondibeachsurfrentals.webhost.site”?
That said, you may find that your brand name is already snatched up with the ever-coveted .com extension. If that’s the case, consider using a country-code domain (ccTLD) like .uk, .ca, or .de. It’s usually cheaper and can help with local search rankings if you target a regional market.
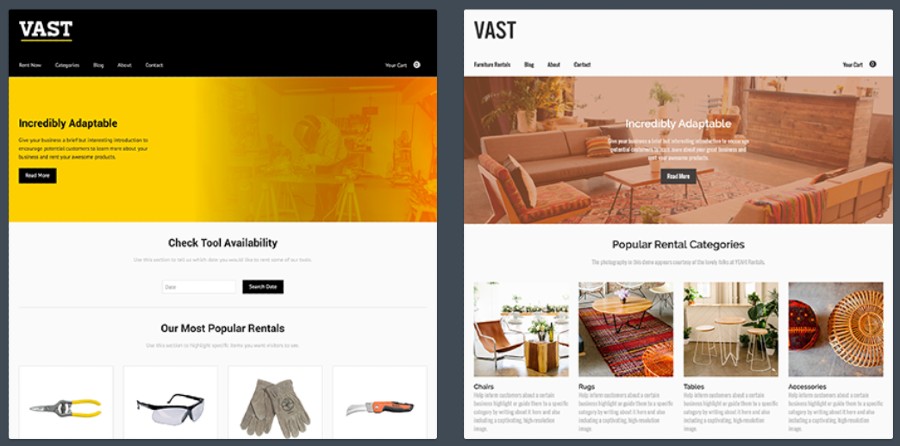
2. Design your rental website
Think of your rental website as your digital storefront. Similar to how you want to make a good first impression when a customer walks through your door, your website should entice visitors to stay and look around.
Here’s how to create a rental website that’s welcoming:
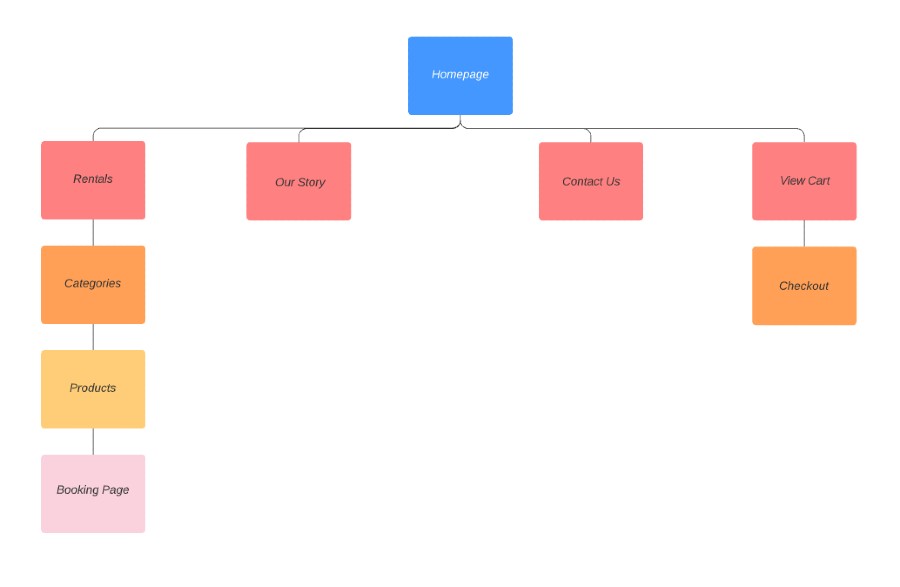
Map out your pages
Before you start adding colours and fonts, it’s best to outline the layout of your site. If your pages look beautiful, but someone can’t find the checkout, then your website won’t serve its initial purpose: to sell rentals.
So, get into the mind of your visitors and imagine the journey they’ll take. What pages should you have? Where will they go first, second, last? How do they expect to find what they’re looking for? You can even check out other rental websites to get an idea of how to structure your own.
There are a few ways visitors will move around your site:
- Primary navigation: as either a horizontal bar or hamburger menu at the top of your website, its purpose is to point visitors to your top pages, such as your Booking page or Why Rent with Us page. If you plan to have a bigger website, you can also use section headers and a drop-down menu to categorize each page.
- Secondary navigation: commonly seen in the footer, it’s where someone scrolls to get to links they didn’t find in the header. It’s best to break up these sub-categories into columns based on utility links (Contact Info, Customer Support), doormat navigation (same as primary navigation), and secondary tasks (Blog, Job Openings)
- Hyperlinks: this is the clickable text that usually appears in the body content. You can use internal links strategically to reference other relevant pages on your site where someone can find more information. For example, if a paragraph on your homepage talks about kayak rentals, you could highlight the term “kayak rentals” and link it to your kayak rentals page.
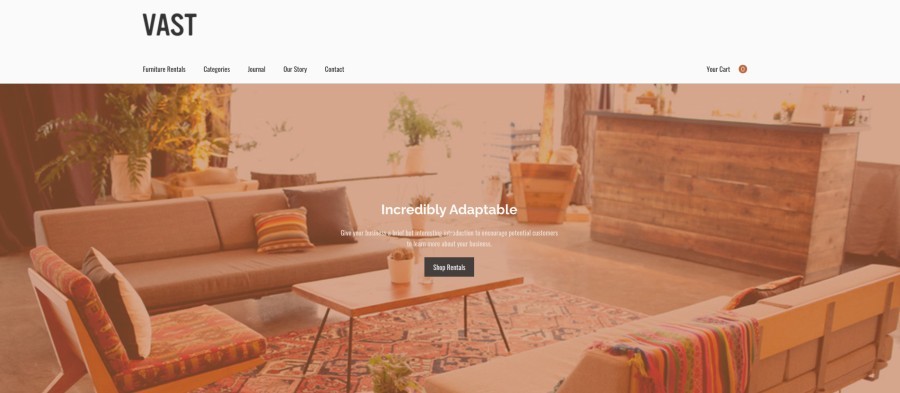
- Call-to-action (CTA): a clickable button that tells visitors what to do on each page and takes them to the next step. For rental sites, some of the most common CTAs are View Rentals, Check Availability, and of course, Book Now.
(Once your website is live, submit your sitemap to Google Search Console to index your pages and make them discoverable by search engines)
Add copy to each page
Every web page should provide visitors with the information they’re expecting to see in a clear and compelling way. In fact, the success of your rental website depends on whether your text, also known as copy, can attract, inform, and ultimately convert visitors into customers.
Depending on the template you chose with your rental website builder, you should already have various page layouts on hand. All you have to do is pick a suitable format for each page and fill in relevant content. Again, it’s a good idea to check out other rental websites for inspiration.
Now, when it comes to writing good copy, you must remember two things:
- Voice and tone: your brand’s perspective and personality
- Goal: what a page is about and what you want to achieve with it
While voice and tone will make your brand memorable and relatable, having a goal will give each page purpose, leading visitors closer and closer to booking a rental. To help you with the latter, consider using a tried-and-true copywriting formula, such as AIDA:
- Attention: attract visitors with a compelling hook, like addressing a pain point, sparking curiosity, or playing on the fear of missing out
- Interest: hold their attention by digging into the benefits; how your rentals will solve a common problem for them
- Desire: pique their interest even more by speaking to their emotions and uncovering the number one reason why they should rent
- Action: seal the deal with a relevant next step
Remember, your web copy will only be effective if it’s easy to read. So, make sure that your pages are scannable by using headings, subheadings, short paragraphs, and lists.
Make your website attractive
With all of your text in place, you can finally get to the fun part: making your website look beautiful and professional, just the way you like. Luckily, you don’t have to be a website designer to do this. Most rental website builders allow customization (without CSS) to add high quality photos and videos or change the colours and fonts to match your brand.
Now, when it comes to your design, try to steer clear of boring, lifeless images. Instead of finding stock photos of your products, consider hiring a photographer to take pictures and videos of your rentals in action. After all, your customers typically rent for the experience they want to have, so this will help them visualize enjoying the rental themselves.
3. Set up online rentals
Once your website looks good to go, you can add the final touch: online rentals. With a rental booking system, your customers can browse options, check availability, add discounts, and, best of all, book a rental anytime, anywhere. That’s right; you’ll get fewer emails and calls yet sell more than ever because your customers can rent all on their own.
So, let’s go over how to add inventory to your website:
Build your products
Not going to lie; this step is going to take time because you’ll have to enter your product details, one by one, before going live. There’s simply no way you can do this in bulk since each of your products will have different rates, availability limits, quantities, etc.
However, you can save yourself hours by preparing everything in advance, so when it’s time to build your products, all you have to do is plug in the information. Here’s what you’ll need for each product:
- Media: one or more photos to showcase different angles (again, avoid using stock photos for authenticity)
- Description: go beyond listing features; get creative by describing the tangible experience someone can have with the rental
- Inventory: the quantity you have in stock
- Availability: the rental period, whether that’s all day, per night, fixed time slots, or custom increments (e.g. 30 minutes, 1 hour, 2 hours)
- Seasonality: when it can be rented throughout the year, even the days of the week
- Duration: minimum and maximum rental time
- Pricing: rates per booking time, including any incremental discounts for longer rental periods
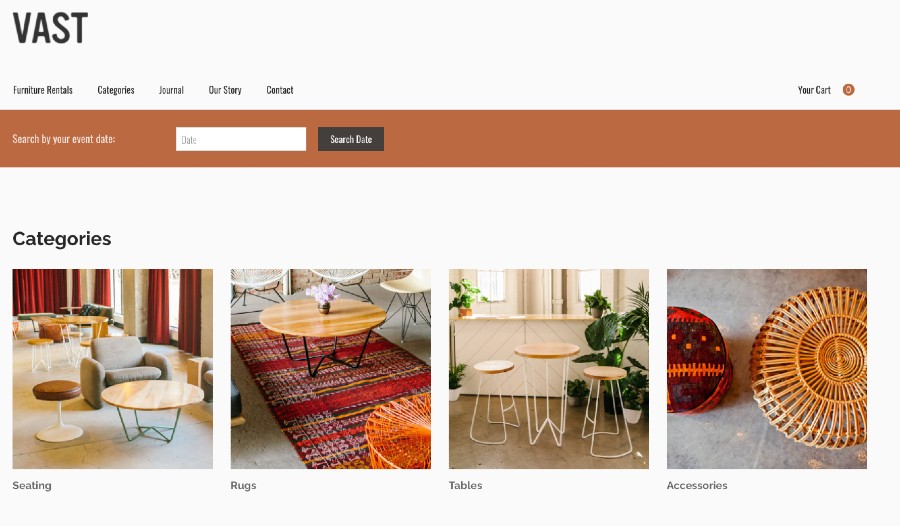
Organize your inventory
Unless you only rent out one thing, you might want to consider organizing the inventory on your website rather than listing everything on one page. You can do this by grouping your items so that customers can narrow their search on the booking page by quickly selecting a category.
For example, let’s say you offer mountain bike rentals. You could sort your items by either of the following:
- Brand name: Rocky Mountain, Transition, Santa Cruz, Pivot
- Bike type: XC, Trail, All-Mountain, Enduro, Dirt Jump
- Gear: Bikes, Helmets, Gloves, Knee pads, Shock pumps
Create a booking form
After customers select a product, they will have to fill out an online booking form to complete the rental. This allows you to collect their contact information so that you can send a confirmation and reminder email to keep them up to date about their rental (something you can do automatically with Checkfront’s Custom Notifications!)
Of course, you can also add custom fields to your booking form to get the specific details you need from them based on what they’re renting. For example, if you are renting out skis, you might want to ask for shoe size, height, weight, and experience level so that you can get everything ready before they arrive.
Write a rental agreement
Suppose you don’t want to worry about printing off rental agreements all the time, asking customers to sign them at check-in, and filing them away in a storage cabinet. In that case, you should strongly consider sending out digital rental agreements as part of the booking process.
If your rental booking system comes with digital waivers, you can edit a template by typing the terms and conditions (or copying and pasting from the original document) and adding editable fields that customers can fill out online, such as a name, date, signature, and checkbox.
Add a booking page
Once you’ve got everything set up in the back-end, you can go live with your products on your website. There are a few easy ways you can do this:
- Link a Hosted Customer Booking Page: copy the URL of your default booking page and paste the link to a CTA button on your website
- Embed a Booking Widget: generate a shortcode from your booking system, then copy and paste it to your web page HTML. The booking widget will adapt to your website layout
- Install a Booking Plugin: follow a similar embedding process by installing a booking plugin if you use WordPress or another CMS
Final thoughts
That’s it! You’re all set to go! If you have any more questions about how to create a rental website, feel free to let us know.
Looking for a website builder with online bookings?
Get started with Checkfront today!
Online bookings. Flexible pricing. Outstanding support.